Look around and you will notice that metal is everywhere. From the structure of buildings to the tools used in everyday life, metal plays a vital role in shaping the world. Yet behind every beam, panel, and component lies a process that transforms raw material into something functional and precise. This process is known as metal fabrication, and it combines creativity, engineering, and craftsmanship in ways that often go unnoticed.
Boise Metal Fabrication is more than just cutting and assembling materials. It is a detailed process that involves planning, shaping, and finishing metal to meet specific design requirements. Whether used in construction, manufacturing, or custom projects, metal fabrication brings ideas to life with strength, durability, and precision.
Understanding the Basics of Metal Fabrication
Metal fabrication refers to the process of creating metal structures and components by cutting, bending, and assembling raw materials. It starts with basic forms such as sheets, bars, or tubes and transforms them into finished products through a series of techniques.
The process begins with design and planning. Engineers and designers create detailed specifications that guide the fabrication process. These plans ensure that each piece meets the required dimensions and performance standards.
Once the design is finalized, the fabrication process moves into production. This involves shaping the metal using specialized tools and techniques. Each step requires careful attention to detail to ensure accuracy and consistency.
The final stage involves finishing and inspection. This ensures that the fabricated product meets quality standards and is ready for use. From start to finish, metal fabrication is a structured process that blends technical skill with creative problem solving.
Key Processes in Metal Fabrication
Metal fabrication involves several core processes that work together to shape and assemble materials. Cutting is one of the most fundamental steps. This process involves dividing metal into smaller pieces using methods such as sawing, shearing, or advanced techniques like laser cutting.
Bending is another essential process. It involves shaping metal into specific angles or curves using tools such as press brakes. This step is crucial for creating components that fit together accurately.
Welding plays a central role in assembling metal parts. It involves joining pieces together by melting and fusing them at high temperatures. This creates strong and durable connections that can withstand significant stress.
Machining is often used to refine parts and achieve precise dimensions. This process removes material from a workpiece to create detailed features and smooth surfaces.
Each of these processes requires skill and precision, as even small errors can affect the final product. Together, they form the foundation of metal fabrication.
Materials Commonly Used in Fabrication
Different types of metal are used in fabrication depending on the requirements of the project. Steel is one of the most widely used materials due to its strength and versatility. It is commonly used in construction and heavy duty applications.
Aluminum is another popular choice because of its lightweight properties and resistance to corrosion. It is often used in industries where weight is a critical factor, such as transportation and design.
Stainless steel is valued for its durability and resistance to rust. It is frequently used in environments where hygiene and longevity are important, such as food preparation and medical applications.
Other metals, such as copper and brass, are used for specific purposes that require conductivity or decorative appeal. The choice of material plays a significant role in the performance and appearance of the final product.
Applications of Metal Fabrication
Metal fabrication is used across a wide range of industries, making it an essential part of modern life. In construction, it is used to create structural components such as beams, columns, and frameworks that support buildings and infrastructure.
In manufacturing, fabricated metal parts are used to produce machinery, tools, and equipment. These components must meet strict standards to ensure reliability and safety.
The automotive and transportation industries rely heavily on metal fabrication for parts such as frames, panels, and engine components. Precision and durability are critical in these applications.
Metal fabrication is also used in custom design projects. From decorative railings to furniture, it allows for unique creations that combine function with aesthetic appeal.
This versatility makes metal fabrication a key process in both industrial and creative fields.
The Importance of Precision and Quality
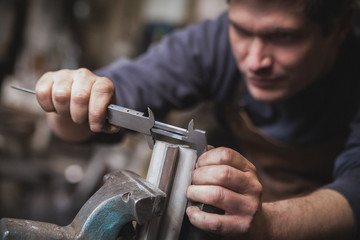
Precision is one of the most important aspects of metal fabrication. Accurate measurements and careful execution ensure that each component fits correctly and performs as intended.
Quality control is an essential part of the process. Each stage of fabrication is monitored to identify and correct any issues. This helps maintain consistency and ensures that the final product meets required standards.
Advanced technology has enhanced precision in metal fabrication. Computer controlled machines allow for highly accurate cuts and shapes, reducing the risk of error and improving efficiency.
Despite technological advancements, skilled craftsmanship remains vital. Experienced fabricators bring a level of expertise that ensures both functionality and visual quality.
Customization and Innovation in Metal Fabrication
One of the most exciting aspects of metal fabrication is its ability to support customization. Projects can be tailored to meet specific requirements, whether for industrial use or artistic expression.
Custom fabrication allows for unique designs that would not be possible with standard components. This is particularly valuable in architecture and design, where individuality and creativity are important.
Innovation continues to drive the field forward. New techniques and technologies are expanding the possibilities of what can be achieved with metal. This includes more efficient production methods and the ability to work with complex designs.
As industries evolve, metal fabrication adapts to meet new challenges and opportunities. This ongoing innovation ensures that it remains a vital part of modern development.
Safety and Sustainability in Fabrication
Safety is a critical consideration in metal fabrication. The processes involved often require high temperatures, heavy equipment, and precise handling. Proper training and protective measures are essential to ensure a safe working environment.
Sustainability is also becoming an important focus. Many fabrication processes now aim to reduce waste and improve energy efficiency. Recycling metal is a common practice that helps conserve resources and reduce environmental impact.
By combining safety practices with sustainable approaches, metal fabrication continues to evolve in a responsible and forward thinking way.
Final Thoughts
Metal fabrication is a complex and essential process that shapes the world around us. From large scale construction projects to intricate custom designs, it brings strength, precision, and creativity together in a single craft.
Through careful planning, skilled execution, and ongoing innovation, metal fabrication continues to support a wide range of industries and applications. It transforms raw materials into functional and meaningful structures that stand the test of time.
Understanding the process behind metal fabrication reveals the level of expertise and detail involved in creating the metal components we often take for granted. It is a field that combines art and engineering, making it both practical and inspiring in equal measure.